
Easy Loaded Cheesy Pocket Tacos Recipe
Introduction
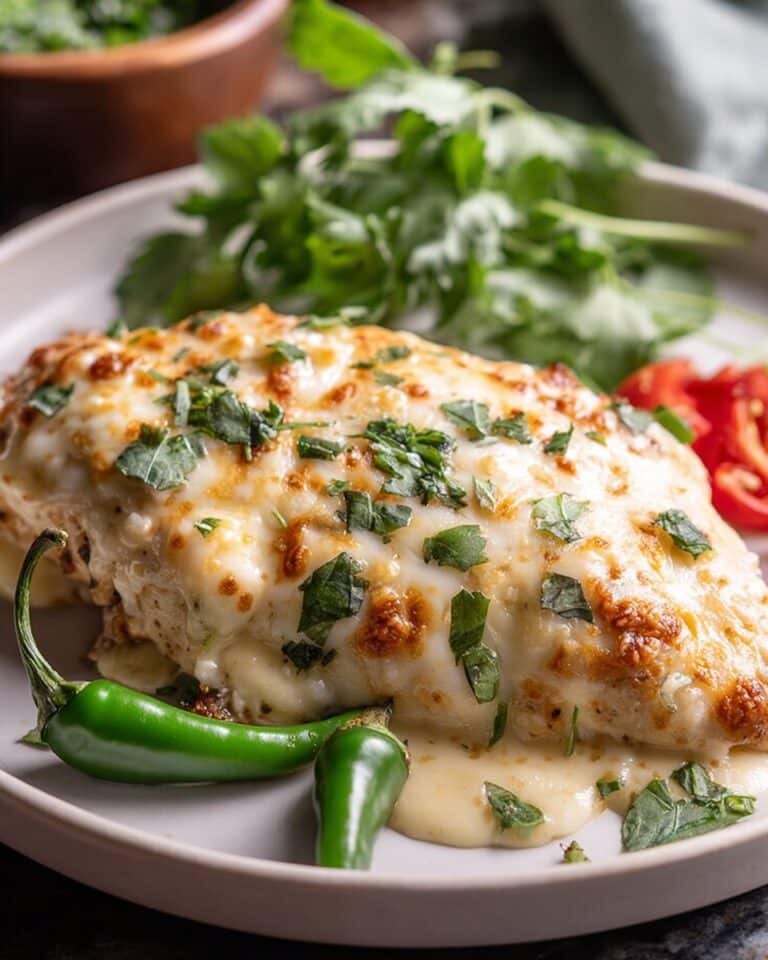
Easy Loaded Cheesy Pocket Tacos are a delicious and satisfying meal perfect for any day of the week. Filled with seasoned ground beef, melted cheese, and optional toppings, these hand-held pockets are crispy, gooey, and bursting with flavor.

Ingredients
- 1 tbsp olive oil
- 1 ½ lbs lean ground beef
- 1 large yellow onion, finely chopped
- 3 cloves garlic, minced
- 1 packet (1 oz) taco seasoning mix
- ½ cup beef broth
- ½ cup tomato sauce
- 1 tsp ground cumin
- ½ tsp smoked paprika
- Salt and black pepper to taste
- 12-16 medium flour tortillas (8-inch diameter)
- 4 cups shredded Colby Jack or Mexican blend cheese
- 2 tbsp vegetable oil, for pan-frying
Optional add-ins & toppings:
- 1 can (15 oz) refried beans, heated
- Sliced pickled jalapeños
- Sour cream or Greek yogurt
- Salsa or pico de gallo
- Guacamole or diced avocado
- Fresh cilantro, chopped
- Shredded lettuce
- Lime wedges
Instructions
- Step 1: Heat olive oil in a large skillet over medium-high heat. Add ground beef, breaking it up, and cook until browned, about 6-8 minutes. Drain excess fat.
- Step 2: Reduce heat to medium. Add chopped onion and cook until softened, about 5-7 minutes. Stir in minced garlic and cook for 1 minute until fragrant.
- Step 3: Add taco seasoning, ground cumin, and smoked paprika to the skillet. Cook and stir for 1 minute to combine flavors.
- Step 4: Pour in beef broth and tomato sauce. Cover and simmer on low heat for 10-15 minutes until sauce thickens and flavors meld. Season with salt and pepper to taste. Let the filling cool slightly.
- Step 5: Warm tortillas briefly in the microwave or a dry skillet to make them pliable. Lay one tortilla flat, then sprinkle ¼ cup shredded cheese over half the tortilla, leaving a small border.
- Step 6: Spoon 2-3 tablespoons of meat filling over the cheese. Optionally, add a thin layer of heated refried beans or sliced pickled jalapeños. Top with another ¼ cup shredded cheese.
- Step 7: Fold the empty half of the tortilla over the filling to form a semi-circle pocket. Gently press the edges to seal. Repeat for remaining tortillas and filling.
- Step 8: Heat vegetable oil in a large non-stick skillet over medium heat. Place 2-3 pocket tacos seam-side down and cook for 3-5 minutes until golden and crispy.
- Step 9: Carefully flip each pocket and cook another 3-5 minutes on the other side until golden brown and the cheese inside is melted.
- Step 10: Transfer cooked pockets to a wire rack and keep warm in a low oven if cooking in batches, adding more oil to the skillet as needed.
- Step 11: Cut tacos diagonally and serve immediately with optional toppings like sour cream, salsa, guacamole, cilantro, shredded lettuce, and lime wedges.
Tips & Variations
- For extra flavor, add chopped fresh cilantro into the meat filling before cooking is complete.
- Swap ground beef for turkey or chicken for a lighter option.
- Use corn tortillas for a gluten-free version, though they may be more delicate to fold.
- Add diced bell peppers or corn into the filling for extra texture and color.
- Serve with your favorite hot sauce for an added kick.
Storage
The meat filling can be stored in an airtight container in the refrigerator for up to 2 days. Cooked pocket tacos keep well in the fridge for 2-3 days. Reheat refrigerated pockets in a 350°F (175°C) oven for 5-7 minutes to restore crispness. You can also freeze assembled pockets on a baking sheet until solid, then transfer to a zip-top bag and store for up to three months. Bake frozen pockets with an extra 5-7 minutes added to the cooking time until heated through and crispy.
How to Serve

Serve this delicious recipe with your favorite sides.
FAQs
Can I make the meat filling ahead of time?
Yes, the meat filling can be prepared a day or two in advance and stored in the refrigerator. Reheat gently before assembling the pocket tacos.
What cheese works best for these pocket tacos?
Shredded Colby Jack or a Mexican cheese blend melt beautifully and provide great flavor. You can also experiment with cheddar or Monterey Jack cheeses.
Print
Easy Loaded Cheesy Pocket Tacos Recipe
- Total Time: 50 minutes
- Yield: 12–16 pocket tacos 1x
Description
These Easy Loaded Cheesy Pocket Tacos are a delicious, crispy, and cheesy handheld meal packed with seasoned ground beef and melty cheese inside a crispy tortilla pocket. Perfect for a quick dinner or party snack, they can be customized with optional toppings like refried beans, jalapeños, sour cream, and fresh vegetables.
Ingredients
Main Ingredients
- 1 tbsp olive oil
- 1 ½ lbs lean ground beef
- 1 large yellow onion, finely chopped
- 3 cloves garlic, minced
- 1 packet (1 oz) taco seasoning mix
- ½ cup beef broth
- ½ cup tomato sauce
- 1 tsp ground cumin
- ½ tsp smoked paprika
- Salt and black pepper to taste
- 12–16 medium flour tortillas (8-inch diameter)
- 4 cups shredded Colby Jack or Mexican blend cheese
- 2 tbsp vegetable oil, for pan-frying
Optional Add-ins & Toppings
- 1 can (15 oz) refried beans, heated
- Sliced pickled jalapeños
- Sour cream or Greek yogurt
- Salsa or pico de gallo
- Guacamole or diced avocado
- Fresh cilantro, chopped
- Shredded lettuce
- Lime wedges
Instructions
- Prepare Meat Filling: Brown Beef: Heat 1 tbsp olive oil in a large skillet over medium-high heat. Add ground beef, break it up with a spatula, and cook until it is fully browned, about 6-8 minutes. Drain off any excess fat to keep the filling moist but not greasy.
- Sauté Aromatics and Season: Reduce the heat to medium. Add the finely chopped onion to the skillet and cook until softened, about 5-7 minutes. Add the minced garlic and cook for an additional minute until fragrant. Stir in the taco seasoning mix, ground cumin, and smoked paprika and cook for 1 more minute to bloom the spices.
- Simmer Filling: Pour in the beef broth and tomato sauce. Cover and let the mixture simmer on low heat for 10-15 minutes to meld the flavors and thicken the sauce. Season with salt and black pepper to taste. Allow the filling to cool slightly before assembling.
- Assemble Tacos: Warm Tortillas & Layer Cheese: Warm the tortillas slightly in a microwave or dry skillet to make them pliable and easier to fold. Lay one tortilla flat, then sprinkle about ¼ cup of shredded cheese over one half, keeping a small border at the edge.
- Add Filling and Optional Layers: Spoon 2-3 tablespoons of the prepared meat filling over the cheese layer. For extra flavor and texture, optionally add a thin layer of heated refried beans or some sliced pickled jalapeños. Top the filling with another ¼ cup of shredded cheese for a gooey, cheesy center.
- Fold into Pockets: Fold the empty half of the tortilla over the filling side to form a semi-circle pocket. Gently press along the edges to seal the filling inside. Repeat this for all tortillas until filling is used.
- Cook Tacos: Pan-Fry First Side: Heat 1-2 tablespoons of vegetable oil in a large non-stick skillet over medium heat. Place 2-3 assembled pocket tacos seam-side down in the skillet. Cook for 3-5 minutes or until the bottom side turns golden brown and crispy.
- Flip and Finish Cooking: Carefully flip each taco pocket and cook the other side for an additional 3-5 minutes until golden brown, crispy, and the cheese inside has melted thoroughly.
- Keep Warm & Cook Batches: Transfer the cooked pocket tacos to a wire rack to keep them crispy. Maintain them warm in a low oven set at 200°F (95°C) while cooking the remaining tacos, adding more oil to the skillet as needed.
- Serve: Slice the tacos diagonally on a cutting board and serve immediately with your choice of optional toppings such as sour cream, salsa, guacamole, fresh cilantro, shredded lettuce, and lime wedges for extra zest and freshness.
- Make Ahead & Freezing Instructions: The meat filling can be prepared in advance and refrigerated in an airtight container for 1-2 days. Fully assembled tacos can be frozen on a baking sheet until solid, then stored in a zip-top bag for up to three months. To reheat frozen pockets, bake directly adding 5-7 minutes to cooking time until heated through and crispy. Refrigerated pockets can be reheated in a 350°F (175°C) oven for 5-7 minutes to restore warmth and crispness.
Notes
- Warming the tortillas before assembling helps prevent cracking when folding.
- Drain excess fat from the cooked beef to avoid soggy pockets.
- Use a non-stick skillet for pan-frying to reduce the amount of oil needed and avoid sticking.
- If you prefer spicier tacos, add extra jalapeños or a dash of hot sauce to the filling.
- For a gluten-free version, substitute flour tortillas with corn tortillas that are pliable enough to fold without breaking.
- Leftover cooked meat filling can be repurposed in burritos, nachos, or taco salads.
- Adjust cheese types based on preference—Monterey Jack or Queso Oaxaca can also be delicious.
- Optional toppings like sour cream and guacamole add creaminess that balances the spicy flavors.
- Prep Time: 15 minutes
- Cook Time: 35 minutes
- Category: Main Dish
- Method: Frying
- Cuisine: Mexican
Keywords: loaded cheesy pocket tacos, ground beef tacos, pan-fried tacos, easy taco recipe, cheesy tacos, Mexican pocket tacos, handheld tacos


