
Red Velvet Cheesecake Brownies Recipe
Introduction
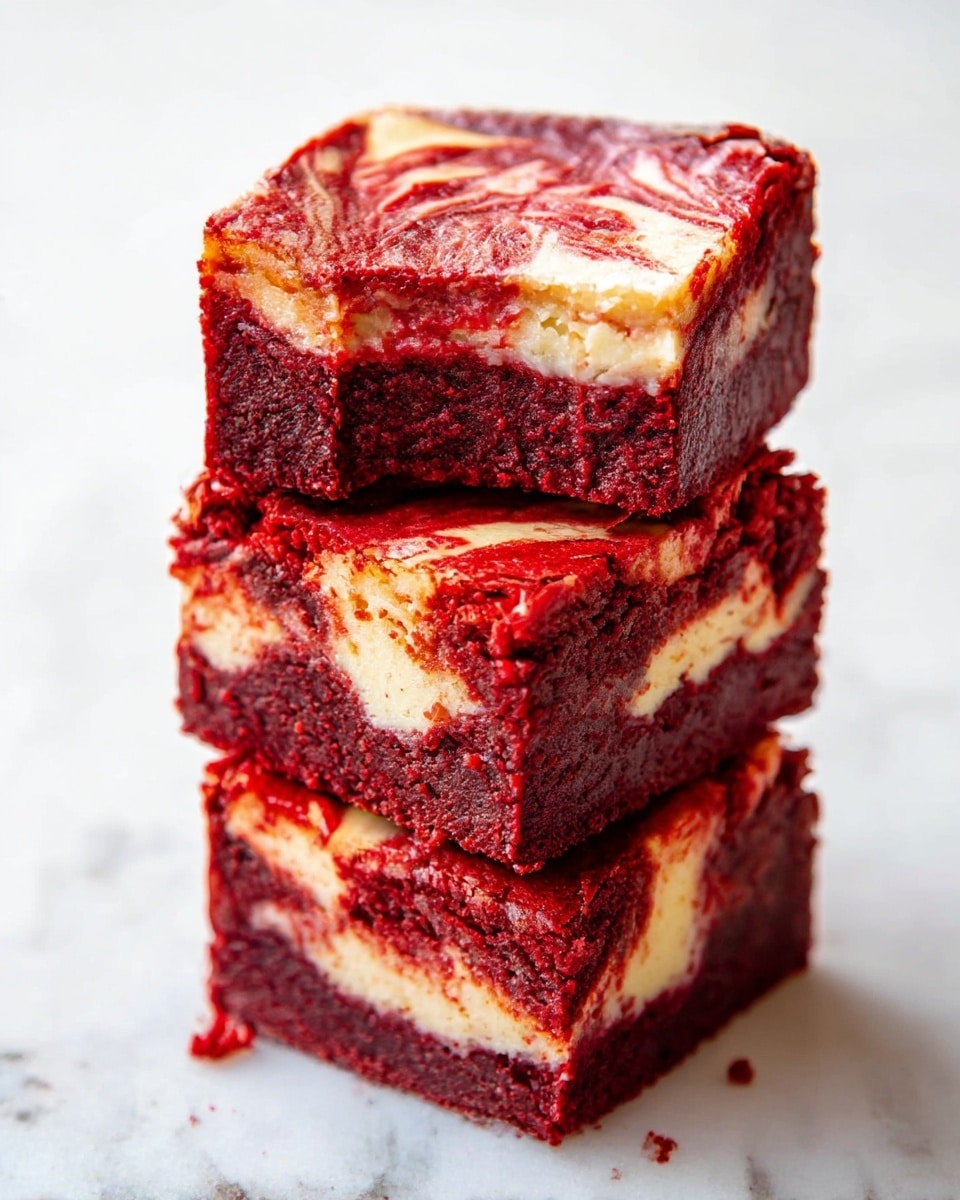
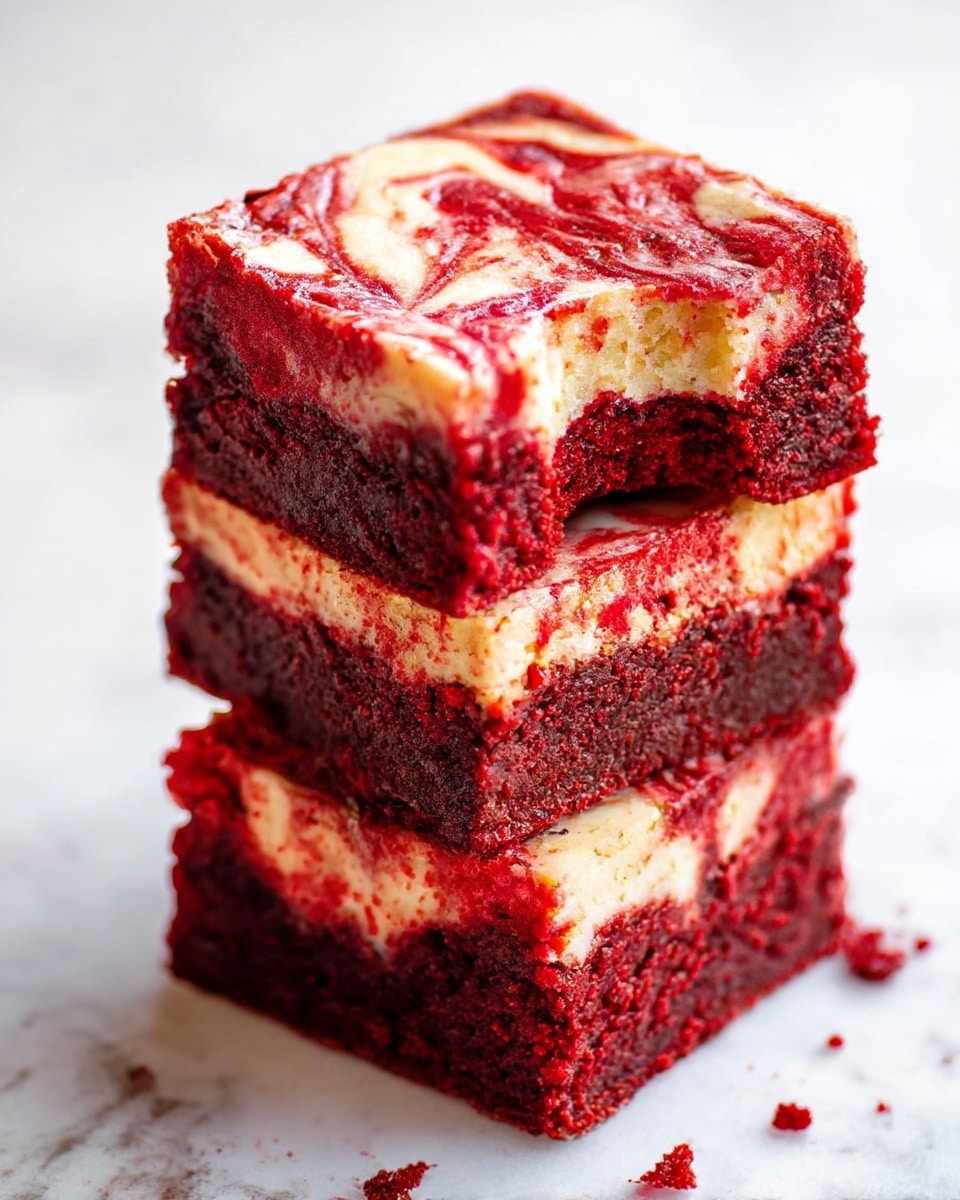
Red Velvet Cheesecake Brownies are a decadent treat combining the rich flavors of classic red velvet cake with a creamy cheesecake swirl. These brownies offer a soft, fudgy texture with a beautiful marbled appearance that’s perfect for any occasion.
Ingredients
- 3/4 cup unsalted butter (diced into large cubes)
- 4 ounces 72% bittersweet chocolate (coarsely chopped)
- 2 cups granulated sugar
- 4 large eggs
- 1 ounce red food coloring (or as needed for desired shade)
- 2 teaspoons vanilla extract
- 1/3 cup unsweetened cocoa powder (sifted if lumpy)
- 1 1/2 cups all-purpose flour
- 1/2 teaspoon kosher salt
- 2 large egg whites
- 8 ounce package cream cheese (very well softened)
- 1/4 cup granulated sugar
- 2 tablespoons all-purpose flour
- 1 teaspoon vanilla extract
Instructions
- Step 1: Preheat the oven to 350°F and line a 9×13-inch pan with heavy-duty aluminum foil if desired for easier cleanup. Spray the pan with cooking spray and set aside.
- Step 2: In a large microwave-safe bowl, add the cubed butter and chopped chocolate. Heat on high for 90 seconds or until melted, stirring until smooth. Heat in additional 15-second bursts if needed.
- Step 3: Whisk in the sugar until combined, though the mixture will seem thick and granular.
- Step 4: Add the eggs and whisk to combine thoroughly.
- Step 5: Stir in the red food coloring and vanilla extract gently at first; add more food coloring if you want a deeper red color.
- Step 6: Add the cocoa powder and stir to incorporate evenly.
- Step 7: Mix in the flour and salt until just combined.
- Step 8: Pour the brownie batter into the prepared pan and set aside.
- Step 9: In a separate bowl, beat the egg whites, cream cheese, sugar, and vanilla on high with an electric mixer for about 5 minutes until smooth and fluffy.
- Step 10: Fold in the flour until incorporated into the cream cheese mixture.
- Step 11: Drop heaping tablespoonfuls of the cream cheese mixture over the brownie batter evenly.
- Step 12: Use a knife to gently swirl the cream cheese mixture into the brownie batter to create a marbled effect.
- Step 13: Bake for 40 to 45 minutes, or until a toothpick inserted in the center comes out clean or with a few moist crumbs. Begin checking at 30 minutes and rotate the pan midway through baking for even cooking.
Tips & Variations
- Use good quality dark chocolate for the best deep chocolate flavor in your brownies.
- Adjust the red food coloring to get a brighter or deeper red tone depending on your preference.
- For an extra touch, sprinkle some white chocolate chips on top before baking.
- Make sure the cream cheese is very soft to ensure a smooth and fluffy swirl.
Storage
Store the brownies in an airtight container in the refrigerator for up to 5 days. Let them come to room temperature before serving for the best texture. You can reheat individual pieces in the microwave for about 15 seconds if desired.
How to Serve
Serve this delicious recipe with your favorite sides.
FAQs
Can I use regular cocoa powder instead of unsweetened?
Yes, regular cocoa powder can be used; just make sure it is unsweetened to avoid altering the sweetness balance.
Can these brownies be frozen?
Yes, you can freeze the brownies for up to 2 months. Wrap them tightly in plastic wrap and place in a freezer-safe container. Thaw in the refrigerator overnight before serving.
Print
Red Velvet Cheesecake Brownies Recipe
- Total Time: 1 hour
- Yield: 12 to 16 brownies 1x
Description
Indulge in the rich and decadent Red Velvet Cheesecake Brownies featuring a moist, fudgy red velvet brownie base swirled with a smooth, fluffy cream cheese mixture. This dessert combines the best of both worlds with the intense chocolate flavor of bittersweet chocolate enhanced by a vibrant red hue and a luscious cream cheese swirl for a gorgeous marbled effect and irresistible taste.
Ingredients
Brownie Batter
- 3/4 cup unsalted butter (diced into large cubes)
- 4 ounces 72% bittersweet chocolate (coarsely chopped)
- 2 cups granulated sugar
- 4 large eggs
- 1 ounce red food coloring (or as needed for desired shade)
- 2 teaspoons vanilla extract
- 1/3 cup unsweetened cocoa powder (sifted if lumpy)
- 1 1/2 cups all-purpose flour
- 1/2 teaspoon kosher salt
Cream Cheese Swirl
- 2 large egg whites
- 8 ounce package cream cheese (very well softened)
- 1/4 cup granulated sugar
- 2 tablespoons all-purpose flour
- 1 teaspoon vanilla extract
Instructions
- Preheat and Prepare Pan: Preheat your oven to 350°F (175°C). Line a 9×13-inch baking pan with heavy-duty aluminum foil for easy cleanup and spray it generously with cooking spray. Set aside.
- Melt Butter and Chocolate: In a large microwave-safe bowl, combine the cubed butter and chopped bittersweet chocolate. Microwave on high for 90 seconds, stirring to smooth. If needed, continue heating in 15-second bursts until fully melted and smooth.
- Add Sugar and Eggs: Whisk in the sugar until combined; the mixture will be thick and granular. Then, whisk in the eggs until fully incorporated.
- Add Flavor and Color: Gently whisk in red food coloring and vanilla extract. Add more food coloring as desired to achieve your preferred red shade.
- Incorporate Dry Ingredients: Stir in the sifted cocoa powder, then add the flour and kosher salt. Mix thoroughly to create the brownie batter.
- Transfer Batter to Pan: Pour the prepared brownie batter into the lined baking pan and set aside.
- Prepare Cream Cheese Swirl: Using a handheld electric mixer, beat the egg whites, softened cream cheese, and sugar on high for about 5 minutes until the mixture is completely smooth and has significantly increased in volume.
- Add Flour and Vanilla to Swirl: Beat in the flour and vanilla extract until incorporated smoothly.
- Layer Cream Cheese Mixture: Drop heaping tablespoonfuls of the cream cheese mixture evenly over the brownie batter. Although it may seem like a lot, it will balance perfectly after swirling and baking.
- Create Marbled Effect: Using a knife, gently swirl the cream cheese into the brownie batter to create a beautiful marbled pattern.
- Bake: Bake the brownies for 40 to 45 minutes, checking at 30 minutes. Rotate the pan halfway through for even baking. They are done when a toothpick inserted in the center comes out clean or with a few moist crumbs.
Notes
- If using a different red food coloring brand or type, adjust quantity to achieve the desired red shade without affecting the batter consistency.
- Rotate the pan midway through baking to ensure even cooking and surface browning.
- The brownies will set fully upon cooling — allow them to cool completely before slicing for clean cuts.
- Heavy-duty aluminum foil lining helps with easy removal and cleanup but is optional.
- Prep Time: 15 minutes
- Cook Time: 45 minutes
- Category: Dessert
- Method: Baking
- Cuisine: American
Keywords: Red Velvet Cheesecake Brownies, red velvet brownies, cream cheese swirl brownies, chocolate brownies, dessert recipe


